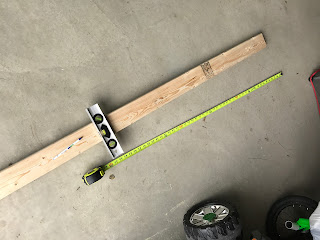
Photo 1: Basically I laid down my three panels that I had cut from one 4x8 RevolutionPly poplar plywood. Remember... I couldn't fit the darn thing in my SUV or strap it to the roof? Bad choice, you'll see why later on. As you can see I have already measured the 2x4's, cut them down to the desired size and lined them up to make sure they fit snug-as-a-bug. I forgot to mention that I had also purchased a 4x6 board for the base. This time I was thinking ahead. The larger surface will allow for a more stable mount at the bottom. You will also notice that the shorter horizontal pieces were cut to fit between the vertical boards instead of on top. This I reasoned to be more stable, but again, I am nowhere near a carpenter or an engineer. Regardless, it worked out fine.
Photo 2: Basic Advice
Photo 2 (and then some): I'm going to repeat a lot that I am not a craftsman, but I will have to say that growing up I helped my Dad and my Uncle work on a lot of projects. Yes, they actually let an 8 year old measure, hammer, screw and paint. I think I used the circular saw a few times (a few years older of course), but I wasn't a fan. That thing was loud as heck and scared the crap out of me.
I helped build a deck, a porch, spackel, drywall, wallpapering (plus the dreaded wallpaper removing) and did a little roofing. Yes, roofing. It was the 80's, 'nuff said. I also did a lot of exterior house painting and scrapping- more scrapping than painting really. At least that's how I remember it because I hated the scrapping part. Gosh those glorified paint brushes with dull metal edges were miserable to use. I So the advice I picked up... "measure twice, cut once", always use a level and a square- then finally, always cut a little bit long; You can always take a little bit more off, but you definitely cannot add it back on. Thanks Dad!
Photo 3: Fastening and Supports
Photo 3: A good three-inch high-strength wood screw was my choice for fastening all the ends and the supports that you can see I am adding to allow structural stability and well as provide a surface for fastening the plywood. I've had plenty of experience with nails and I have no idea why anyone uses them for joining 2x4's and such. Hammering them in is no where near as accurate (unless I suppose you have a nail gun) and the helical ridges of a screw must be more binding than a flush nail, right? When my wife and I had our house built three years ago I can tell you I didn't see very many straight nails in the framing. More like forty-five degree angles that poked out the sides of the boards. "Nice job guys..." I did a better job as an 8 year-old. I also used two screws for each joint, making sure to be dead-center and not too close to any edge of the board. I learned that lesson a long time ago... 'splitsky' goes the board, and that's no good. I can say that I fastened all the joints with no more than a couple millimeter cracks. Yeah me! But before I start tooting by own horn, major fudge number one is approaching soon.
Photo 4: When to use a nail
Photo 4: I've already stated my position on nails vs. screws, but that was mostly directed at joining framing and such. Finishing nails in my opinion are the most useful of all nails. (Maybe, I just made that up). I'd never use a screw in drywall to hang a photo- and no, I've never tried; I'm sure it doesn't end well. The one disadvantage of this poplar plywood that you can see is the grain. Anything too abrasive, dull or of significant girth and this stuff will split. This is my logical deduction, not my expert opinion. So a good, sharp small diameter finishing nail of about an inch length worked perfectly. I took the route of nailing the corners (again, dead center in the board and not near the edge. No 'splitsky' action here), then driving a nail at the estimated center, then a nail each at the halfway point of the corners and the center nail. Worked for me. Let me also add that I hammered each nail to almost flush and then searched for a nail-setter which I could not find (let's improvise), then went through my drill bits for my cordless to find a Philips-head bit that had a small flattened tip that closely matched the diameter of the nail head. This way I could drive the nail in flush without a big round hammer indentation- remember I need to wallpaper this thing and I want it to be smooth. Maybe common sense to a good craftsman, but not completely obvious to the weekend-project amateur.


No comments:
Post a Comment